Getting started with Google Colaboratory - Part 1
Google CoLab is a fantastic platform for getting started with Python and machine learning - especially as it provides free access to GPUs and TPUs to speed up
your neural network training.
Colaboratory is based on the familiar Jupyter notebooks and allows notebooks to shared and run directly from the browser, without installing any tools.
To get started with Colaboratory, you will need to have a Google Drive account and sign up for a Colaboratory account.
- Go to Google Drive and create an account if you don’t already have one.
- Go to Google CoLabs and create an account if you don’t already have one (click on the Sign in button). Allow CoLabs to access your Google Drive.

Colab sign-in
- If you are already familiar with Jupyter Notebook, then CoLabs will be easy to use, otherwise I recommend looking here first.
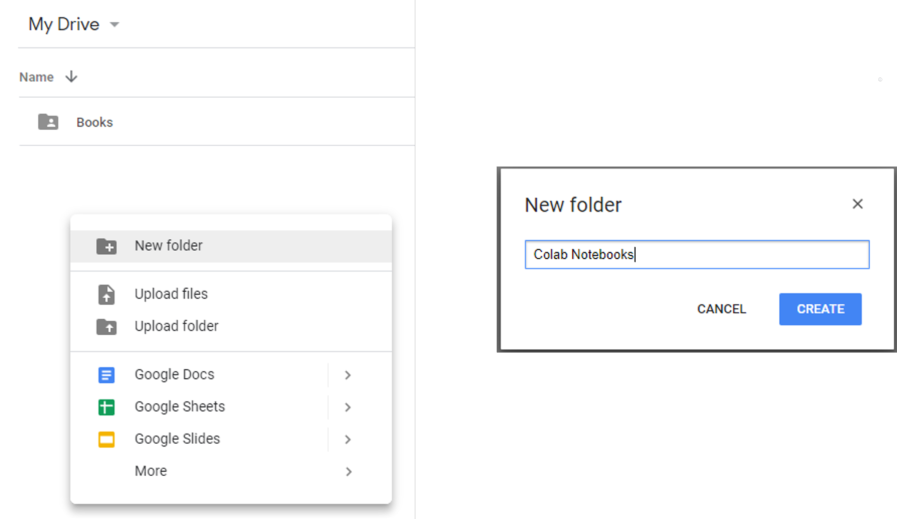
- Create a new folder in Google Drive to store your CoLab notebooks – note that the choice of ‘Colab Notebooks’ is not casual, that’s the default name that Google CoLabs uses.

Create new folder and name as ‘Colab Notebooks’
Creating your first Colab notebook
- Navigate to the ‘Colab Notebooks’ folder on your Google drive. You can create your first notebook directly in Google Drive like this:

New notebook in Google Drive
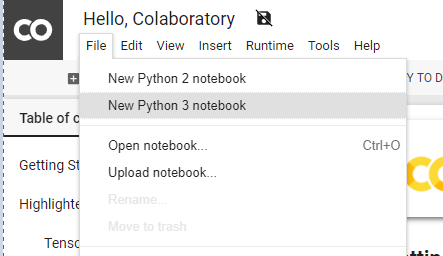
- ..or you can go Google CoLabs and do it there:

New notebook in Colab
- Change the default notebook name from ‘Untitled’ to something more meaningful:

Notebook default name

Renamed to MNIST
- Your notebook currently has one single code cell. Copy the entire contents of the mnist.py file into that cell:

mnist.py file contents copied to cell
- Click on the run button located in the top left corner of the cell:

Run cell contents
- You should see the following output at the bottom of the cell:

Output
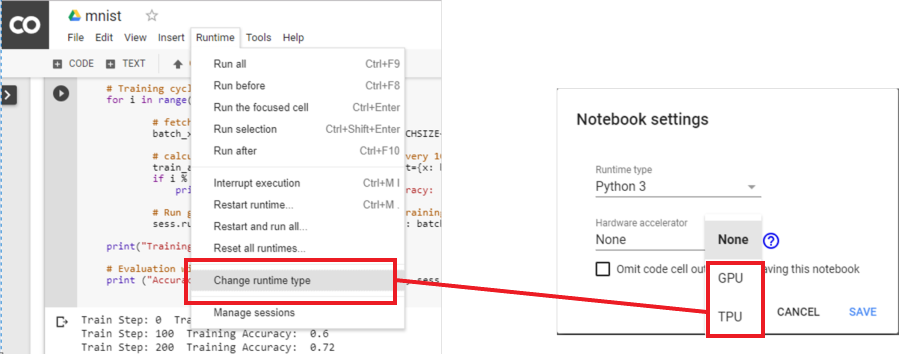
- Change the runtime accelerator to GPU – Google CoLabs provides free usage of a GPU or TPU as accelerator – run it again to see your neural network being trained by a GPU (or TPU).

Select GPU or TPU for acceleration